

Fuselage Fabric
Interior
Cabin Fabric
Exterior Fabric
Registration letters
|
|
|
|
|
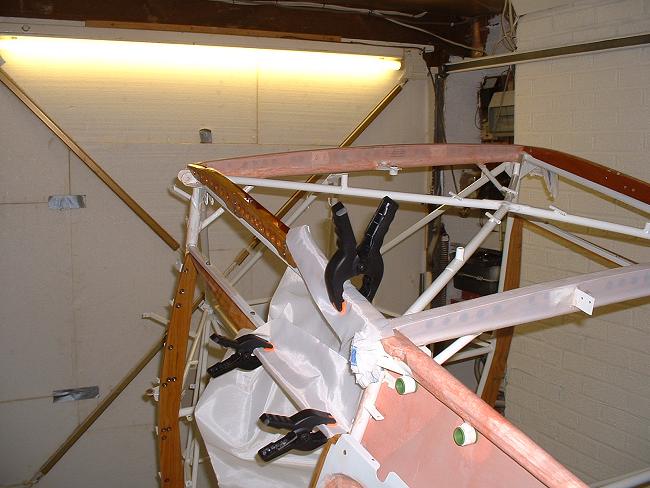
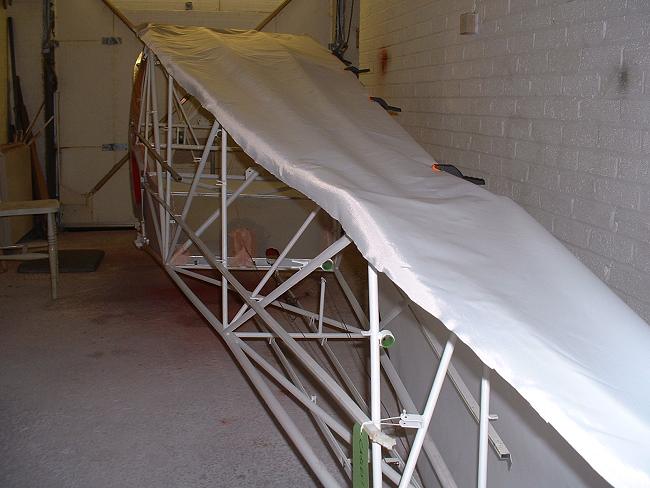
Fabricking of the fuselage interior. Quite difficult around the D windows and fiddly around the wooden skylight frame. |
 |
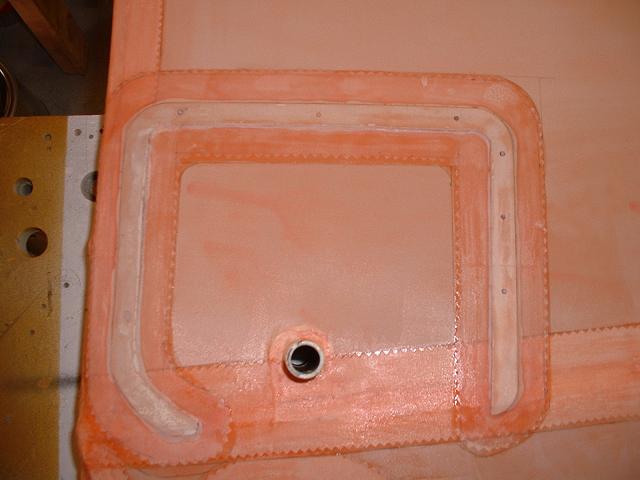
Interior fabric during the "pink goo" stage of the Stits process. |  |
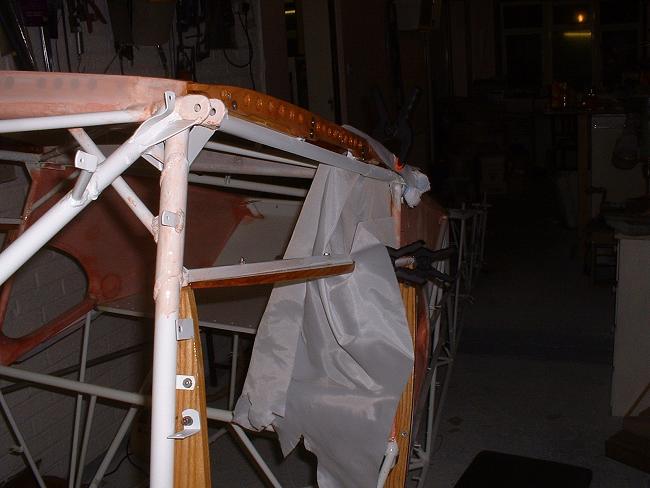
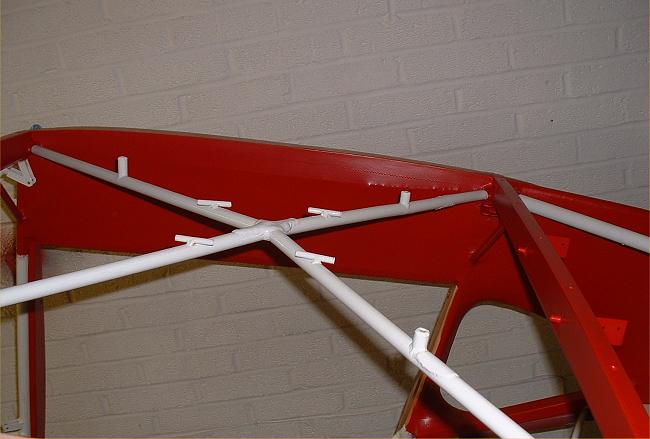
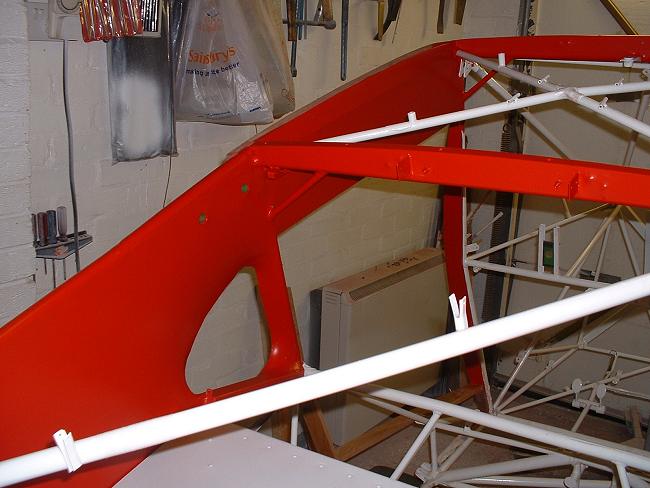
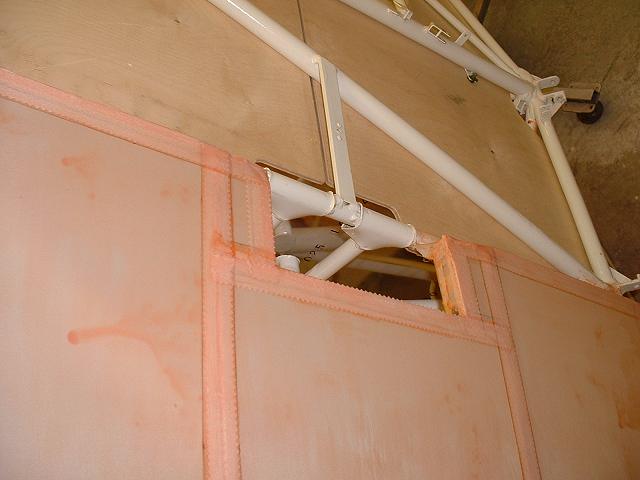
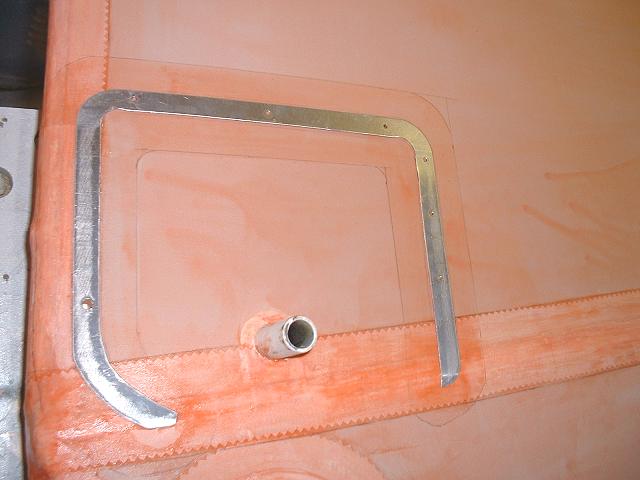
Aluminium frame is glued in, to be covered in fabric. This frame will allow access to the wing tank fittings from inside the cabin. Frame is inside the wing root area so that it will not be seen from inside the cabin. | 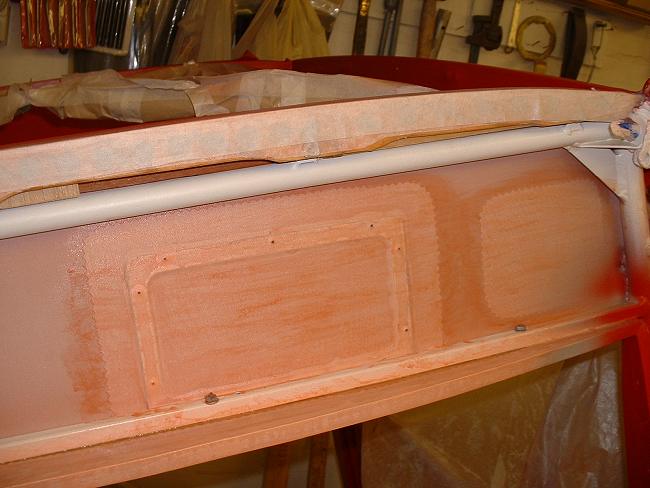 |
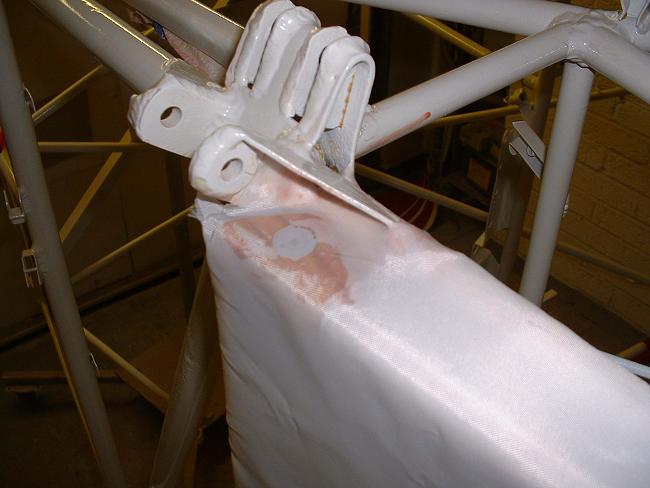
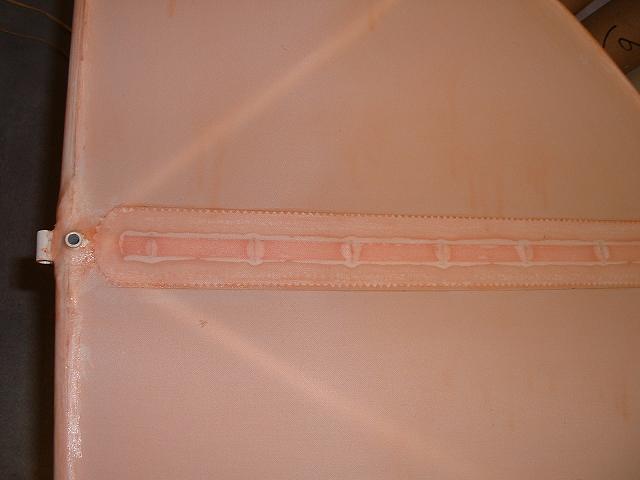
Fabric patch placed on the inside of the wing root. |
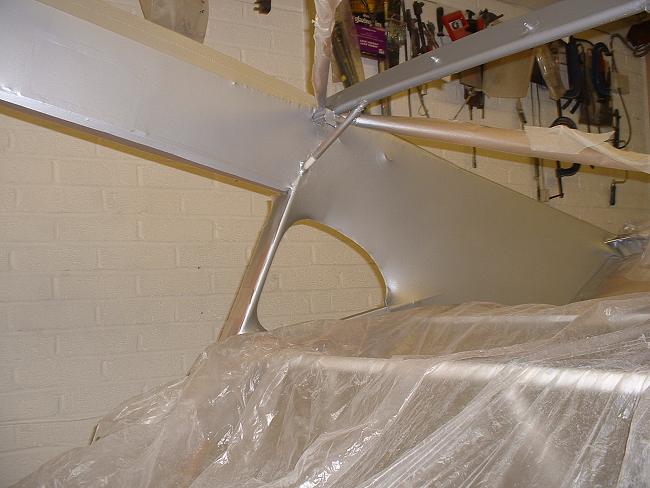 |
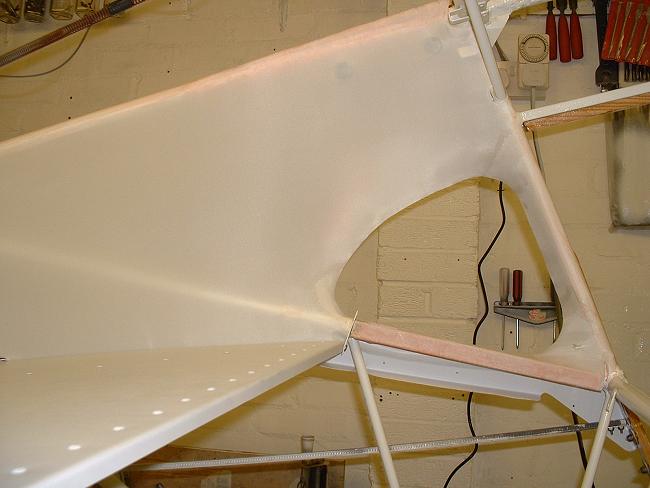
The cabin interior fabric goes silver... |
 |
...and a white undercoat is sprayed on the silver to act as a base for the red topcoat... |
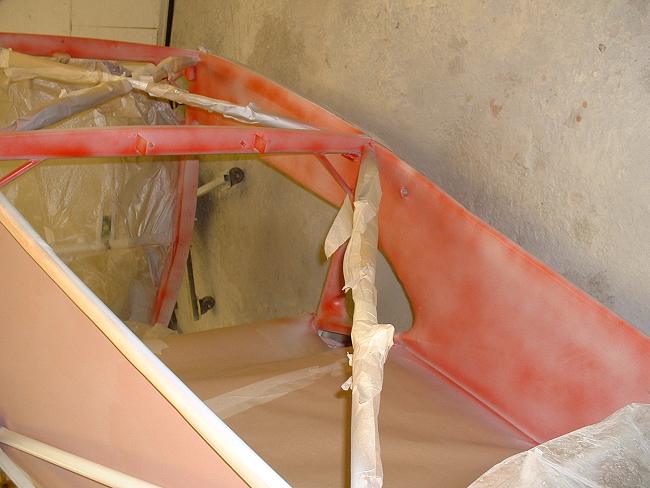 |
...followed by a mist coat of the red top coat... |
 |
 |
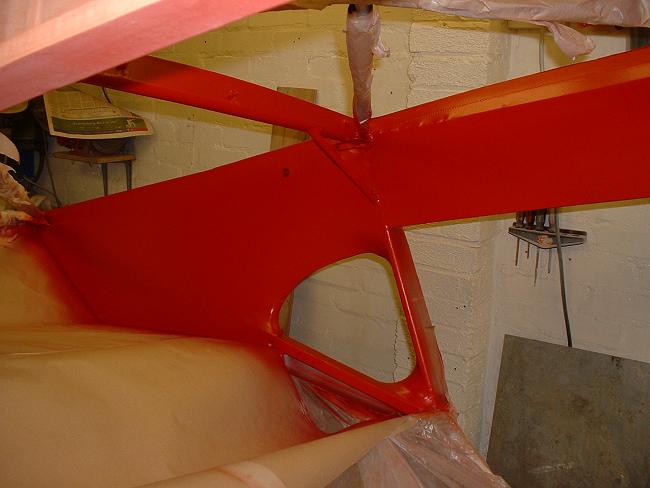
...and three coats of the final colour, in this case, Poly-Fiber "Christen Eagle Red". To improve gloss level, a small amount of high-temperature retarder is used, and all liquids were soaked for 24 hours in a cold room (my fridge). These measures slow down the solvent evaporation rate, and improve the gloss level. |
 |
 |
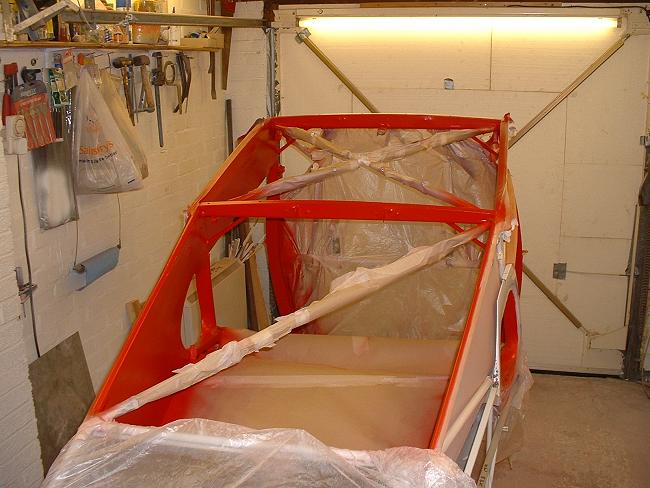
After removal of masking, the effect is quite pleasing. |
| The order for covering the fuselage
is somewhat dictated by the need to join the two sides of the fin to the fabric that lies
on top of the fuselage. I received a lot of help and advice from many folk on this,
but my own choice was dictated by the need to cover the top of the fuselage before the
sides. This was because, as can be seen from previous photos, I had painted my interior before covering the exterior, and if I covered the sides first, I would ruin the interior where I would need to attach the side fabric. By attaching the top fabric before the sides, I would protect this finish. Besides, someone I know has an Auster fuselage in the covering stage at the local airport, and the following sequence is approved by the CAA, so I could use this as a guide! |
||
 |
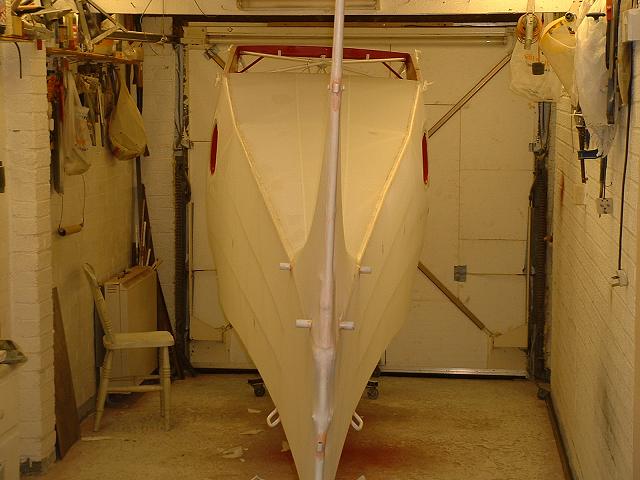
I decided to do the bottom first
(this had no bearing on the top/sides discussion). This would give me a bit of
practice without the end result being too visible. First thing was to cut a bolt
from the roll to somewhere approximating the shape and size needed. Cheap plastic
clamps help throughout this procedure. The green label marked "Cable!" (bottom centre) is to remind me to install the elevator pulleys and elevator & rudder cables prior to closing up the fuselage. |
|
 |
The existing aluminium section stringers were reused (these looked like they were from screen doors). I blocked each attachment point with wood so that the split pin would not be taking all the fabric tension loads. | |
 |
 |
The fabric was carefully glued around the extremities, and also the important cut-outs. |
 |
An important step...calibration of the iron, using heat-sink compound to ensure good contact between the iron plate & thermometer... | |
 |
...and then heat taughtening in two stages in accordance with the Poly-Fiber manual (although a similar process is used in the Ceconite system). | |
 |
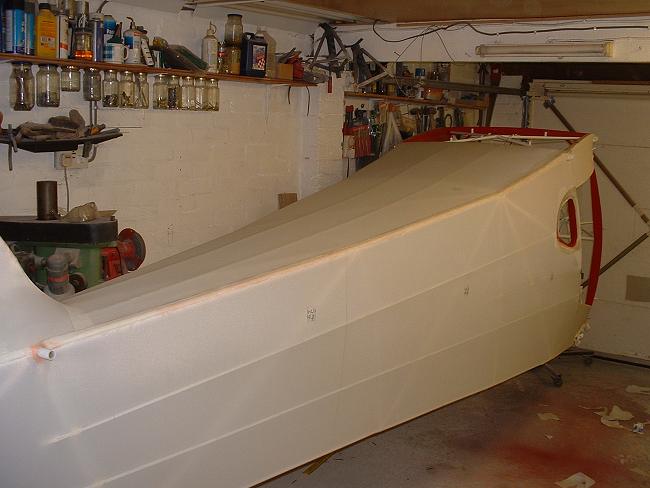
The finished result viewed the correct way up. The fabric is wrapped a long way around the longerons. This means that adhesive need not be applied too close to where the fabric departs the longeron on its way across the width of the fuselage....such gluing can "grab" the fabric in a dip and spoil the visual appearance. | |
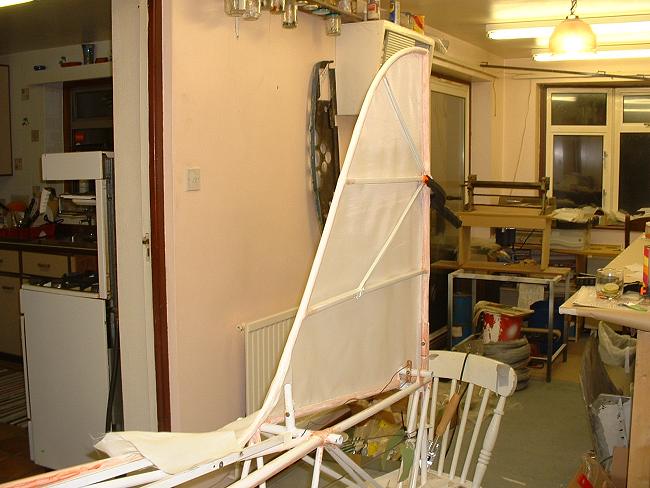  |
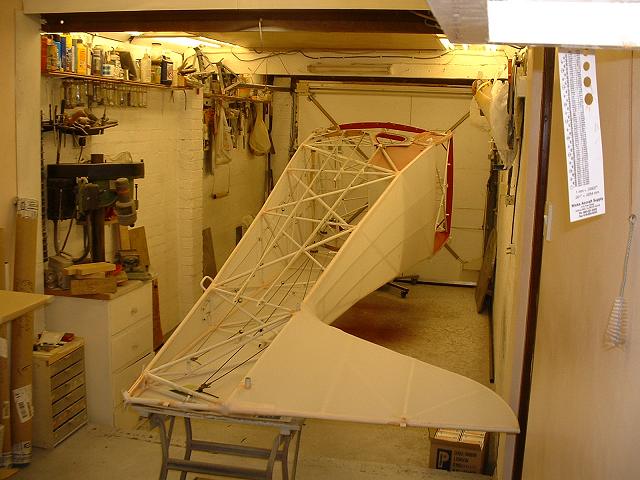
Now for the top. I decided to do the fin
halves separate from the fuselage sides because this was the only way to ensure the top
was complete before the sides. The longitudinal seam at the base of the fin will be
hidden by the horizontal stabiliser. Having smaller pieces to handle was also
useful! I also made a fin alignment jig, to ensure that the fin remains vertical when taughtening the fabric. The "pink goo" stripe is there because I considered stitching before the final heat taughtening, but this proved unnecessary. |
|
 |
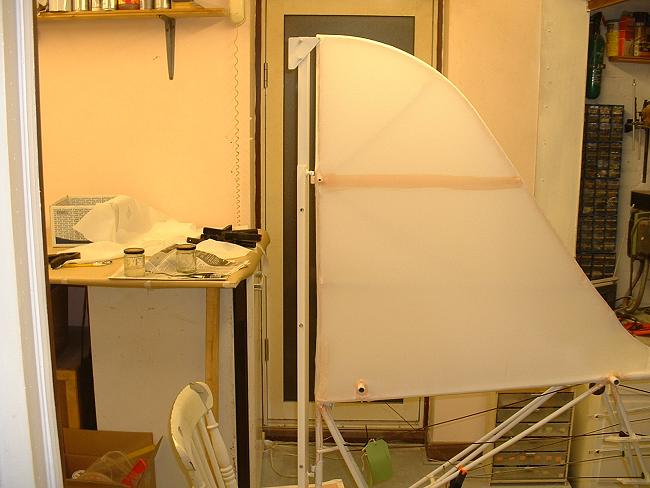
I heat-taughtened the fin sides to the first 250 degree stage and then started gluing the top fabric. | |
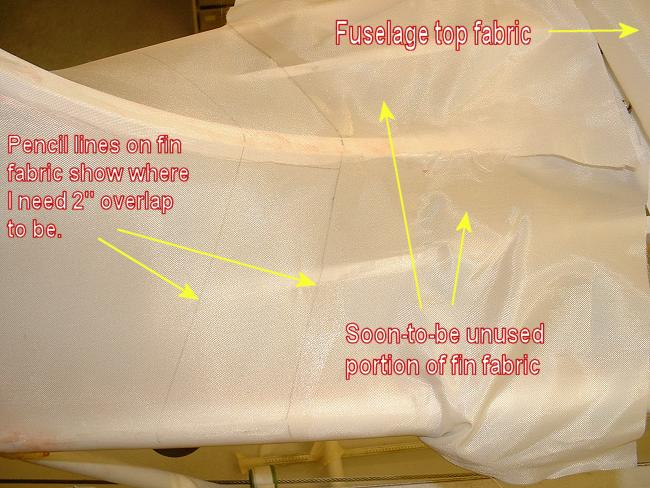 |
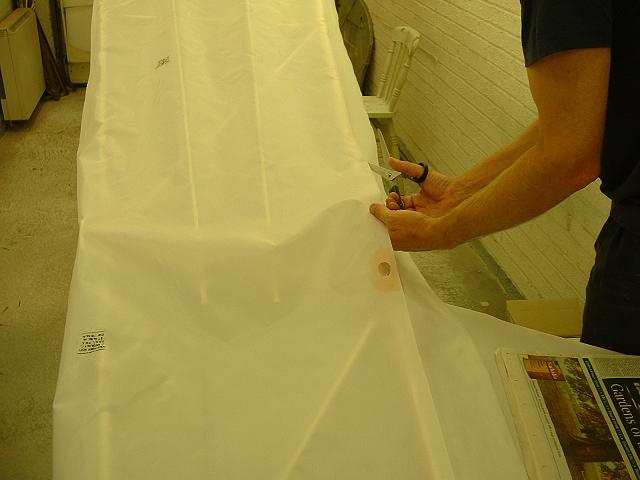
After gluing the top fabric to within a foot or so of the fin, I marked out where I wanted the 2" glued overlap to come. This is somewhat guesswork, but is generally dictated by where the minimum amount of compound curve lies. | |
 |
The fin fabric is then trimmed to size, and a pre-coat of adhesive brushed on to its underside (up to the pencil line) to aid adhesion. | |
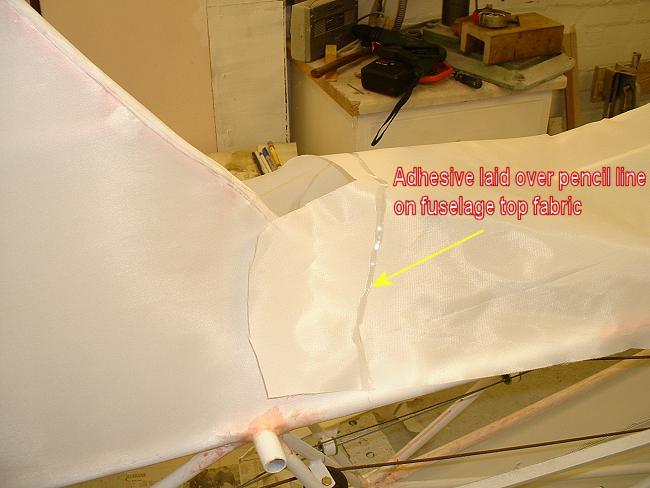 |
I have glued the top fabric to within a foot or so of the join. The as-yet unshrunk top fabric is lined up with my fin fabric, and the join line pencilled in. A brush-line of glue over the pencil line ensures that when cut, the top fabric will not unravel or feather. | |
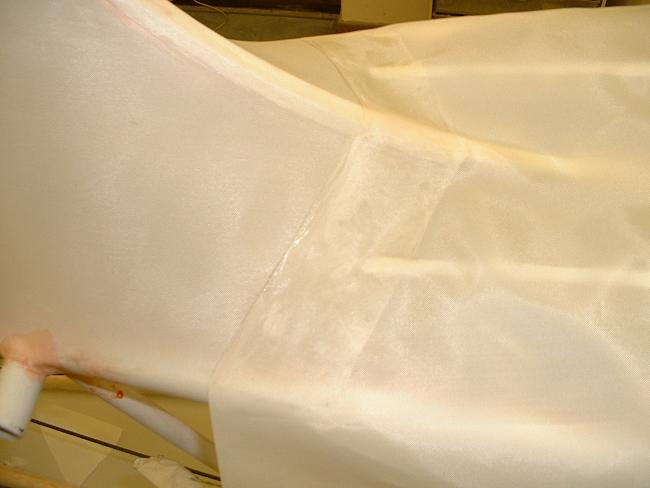 |
After trimming to my aft pencil line, the top fabric is glued to the fin fabric, and the last foot of gluing the top fabric to the upper longerons is finished off. | |
 |
The top fabric can now be heat-shrunk to the first 250 degree stage, after which the fin sides and then the top can be shrunk to the full 350 degrees. A small amount of low-temperature ironing smoothed out the last remaining unevenness of the glued joint. | |
 |
 |
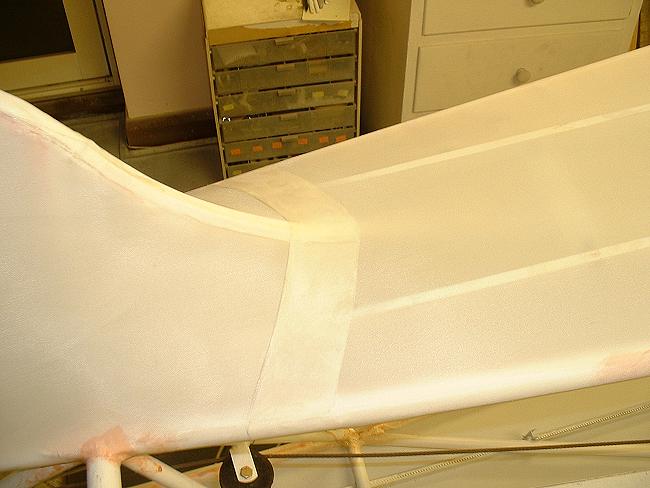
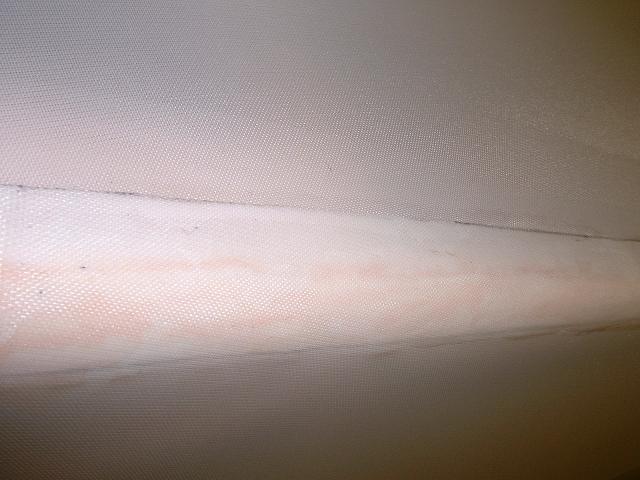
And here's the end result, a neat 2" overlap with the top fabric on top of the fin fabric. This join will need to be taped with a 3" tape for security. The upper fin rib will need stitching too, where I previously applied a strip of pink goo. |
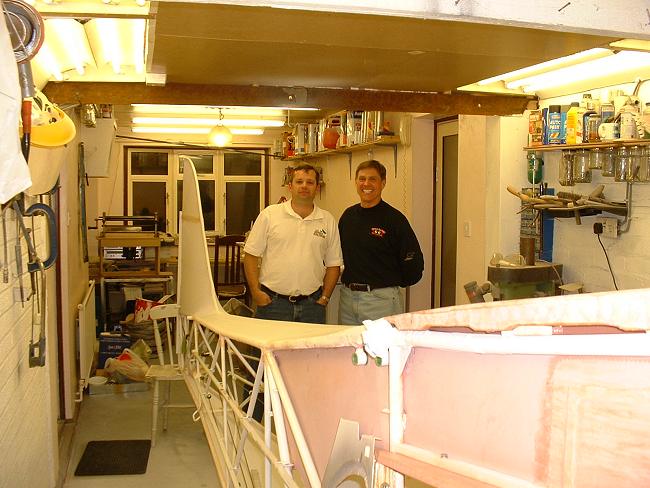 |
Fred Johnson and Dave Bland take valuable time out from some top-level ale-drinking to inspect progress. Fred owns two Taylorcrafts in the States, one of which is undergoing restoration. Both these chaps were in the UK as part of top-secret global investigations into Taylorcraft and Pitts construction methods. |
 |
 |
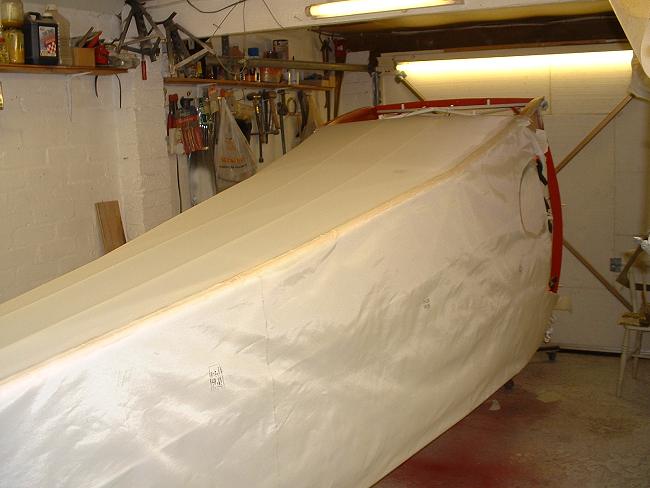
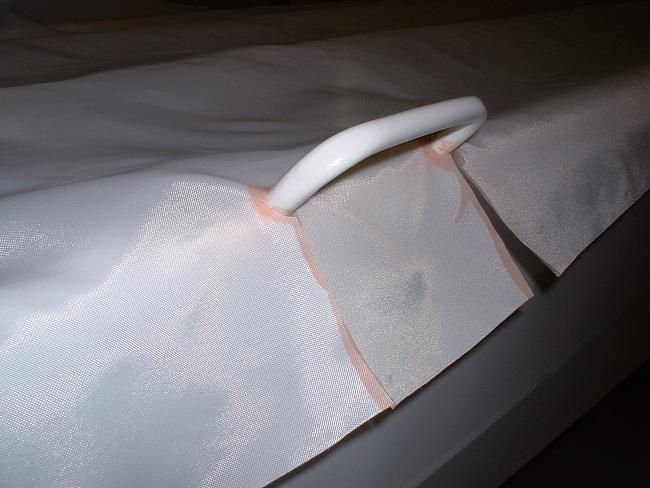
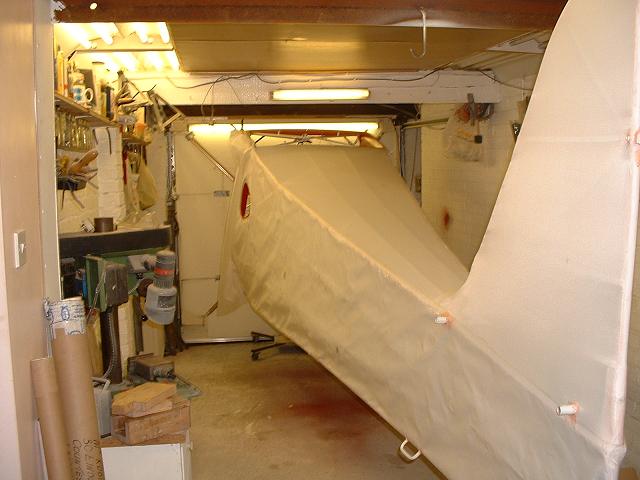
Starboard side fabric laid out and gluing starts. It can be seen how much slack that can remain during the gluing process. This slack will all disappear with heat shrinking. |
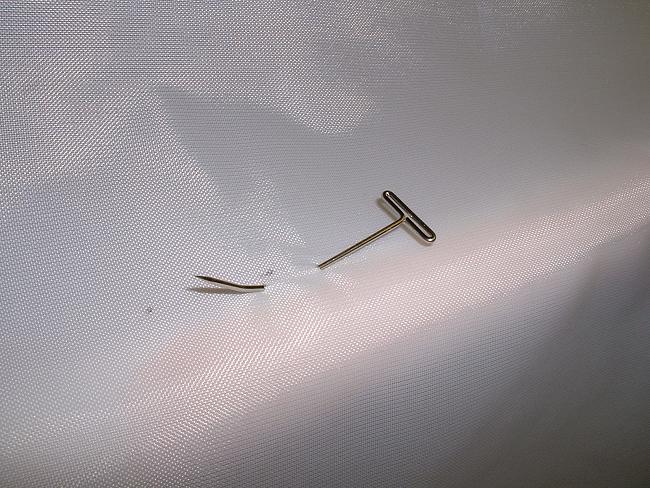 |
Those little T-Pins, available from covering suppliers, are virtually useless straight....so I bent mine (with padded pliers) to get them through the fabric. They leave quite a large hole, so only insert them where a covering tape will later go. | ||
 |
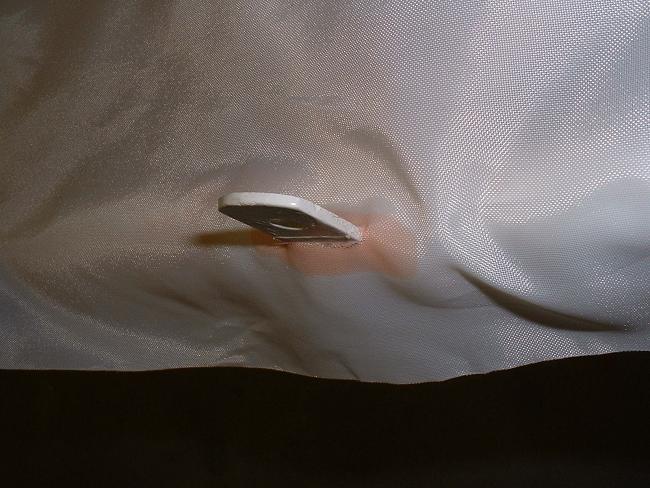 |
Around protrusions, a seam of Poly-Brush is applied to prevent the threads unravelling. | |
 |
 |
Gluing around the D window and the door aperture. Note fabric goes under door catch. | |
 |
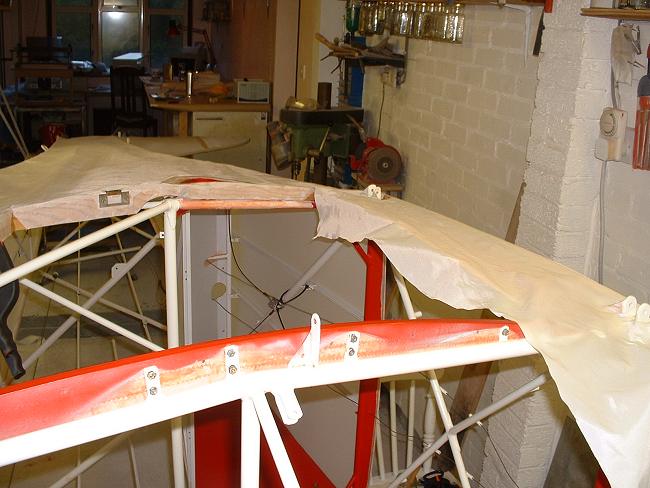
Here's where the side fabric joins the fin. | ||
 |
The finished side. Now for my Inspector to inspect the fuselage interior before closing the fuselage up on the fourth side. | ||
 |
 |
 |
After my Inspector signs off the work to date,
prep work commences for the fourth and last side of the fuselage. A cleaning of the
gluing surfaces using panel wipe, and then the laying up of the covering. Pencil lines are used to mark where the final trimming of the fabric is to go, and as before, each cut line is pre-treated with a thin coat of adhesive prior to the cutting to prevent the edges unravelling. |
 |
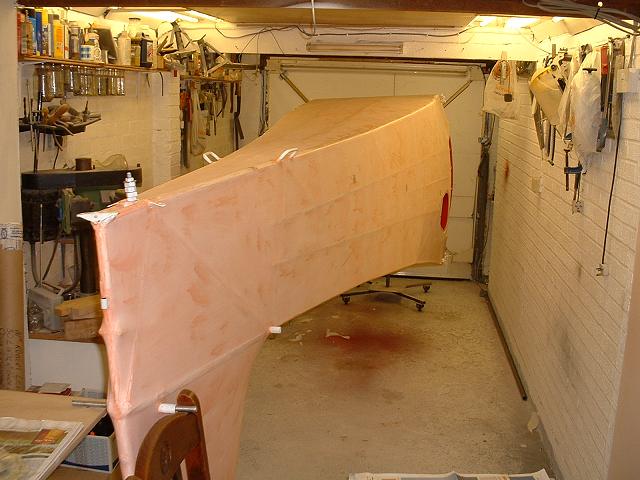
The aft end goes on well. There is no need to try and keep the fabric taught, in fact I put effort into ensuring that it remained slack during the process. But the forward end again looks like an old lady's baggy knickers... |
 |
 |
 |
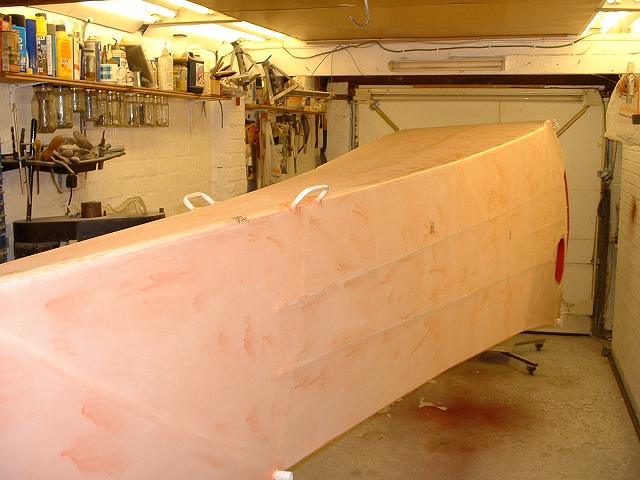
...but with care, all edges are glued down and... |
 |
 |
...after taughtening with the iron, looks good!
But many hours are spent getting the seams smooth. Time spent here will pay
off in the final finish. Note the pencil lines still showing. These will not bleed
through the coatings. But do not use felt pens! The pink colouring in the right hand photo is the pre-treatment of the steel fuselage frame showing through...read the manual carefully! |
 |
 |
"Pink Goo" Poly-Brush is liberally applied by brush. The drips are in fact on the inside of the fabric...it's quite important to brush each face when horizontal so that drips remain on the underside. |
 |
The top rib of the fin gets rib stitched... | 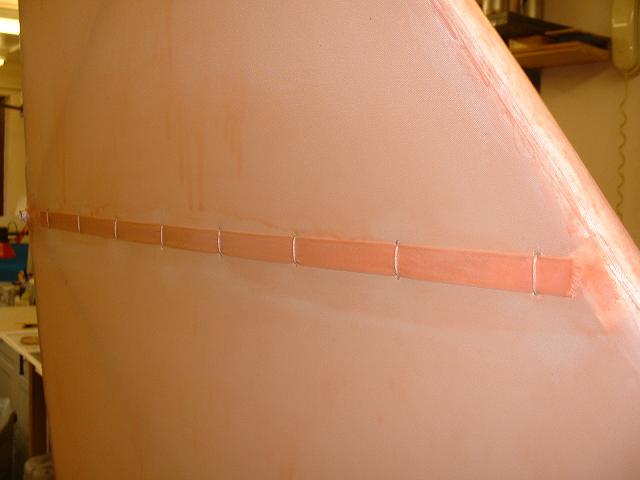 |
...and then the reinforcing tape is soaked with Poly Brush. Note that there is no cord visible connecting each stitch...this passes inside the fin...follow the manual! |
 |
A finishing tape is applied and ironed smooth. | ||
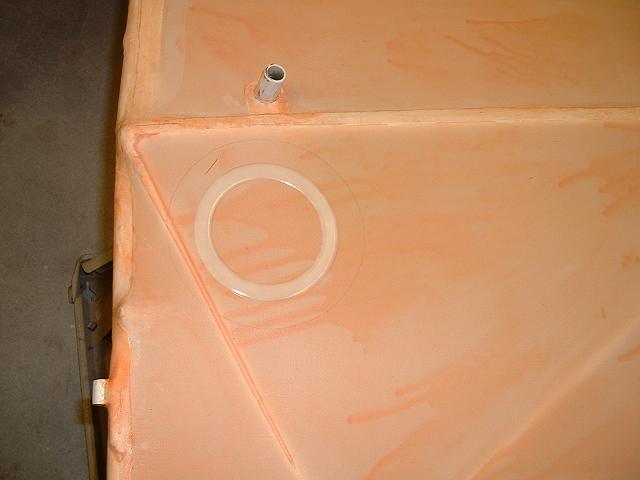 |
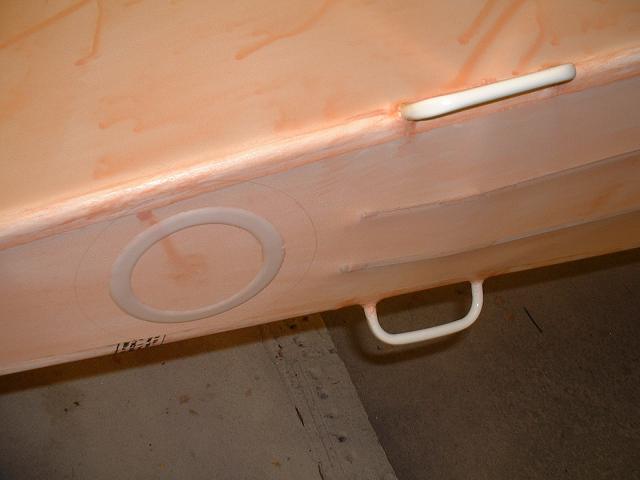
Inspection rings are glued in (note the pencil ring showing where the Poly-Brush is to be applied for attaching the doily.... | 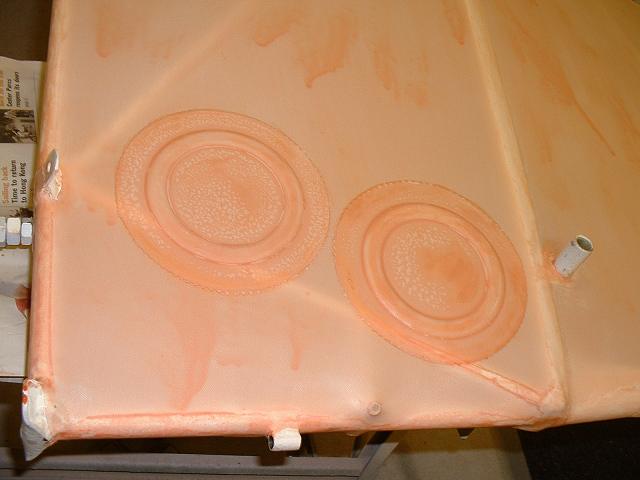 |
...and here are the doilies applied...exactly as per the manual. |
 |
I also put a ring on the underside near the aft end...I may never cut it out, but access back there might be useful in the future. |
 |
The reinforcing gusset over the rear windows is installed as one piece, covering the aperture, so that later overspray will not get in to the painted interior. It will be removed after all the painting is complete. |
 |
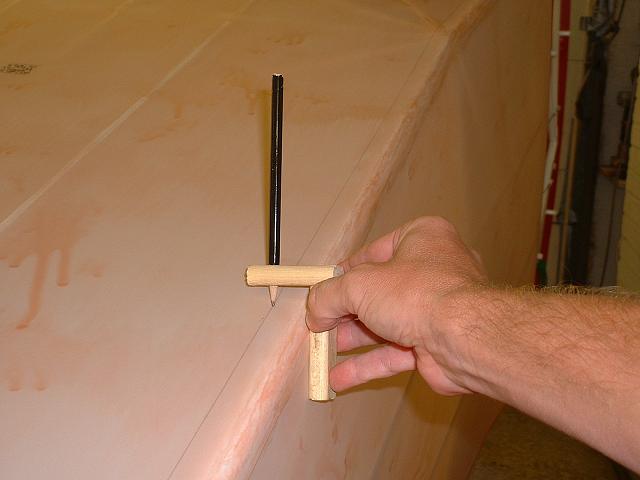 |
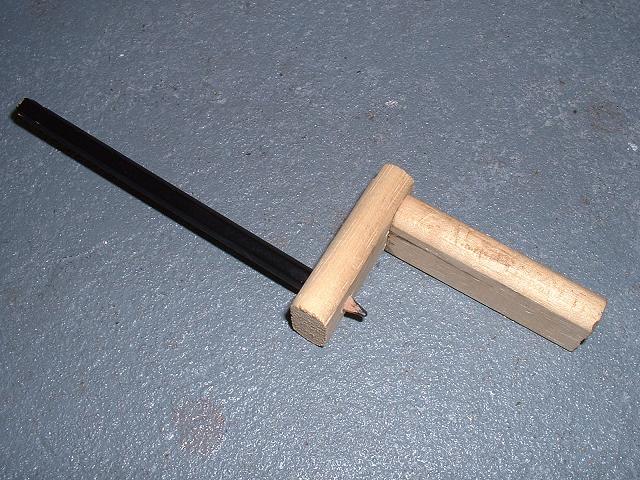
I made a little tool to help me mark the finishing tape pencil lines.... |
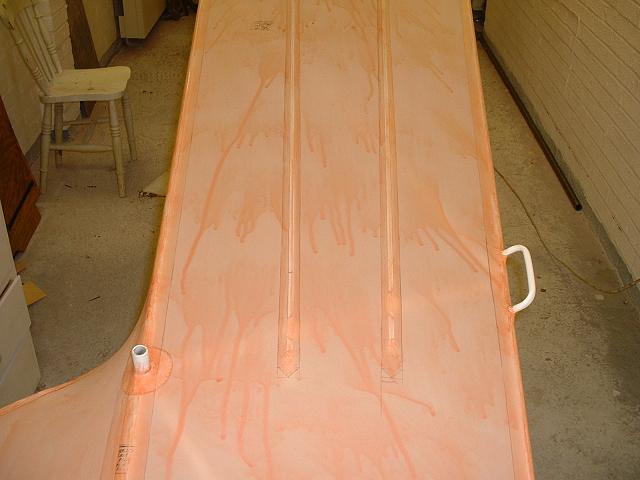 |
...and here's the fuselage side with reinforcing tape locations pencilled up and the first brush coat of pink goo applied. |
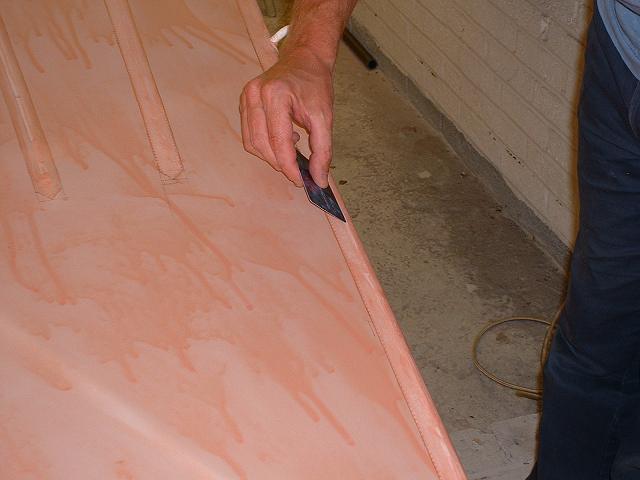 |
Applying the tapes is a lot easier using an old credit card to squeegee the pink goo through and provide a smooth finish. |
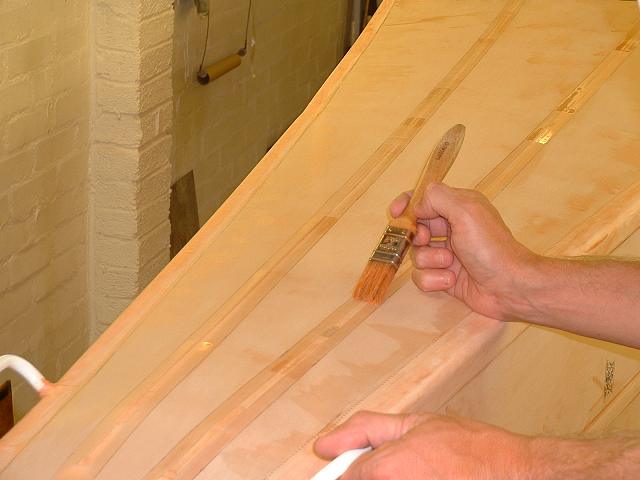 |
Applying a pre-coat of pink goo to the
marked-out tape lines, in this case the tapes over the belly stringers. This ensures
proper adhesion of the tapes. Each requires marking out, pre-treating with pink goo, and after allowing to dry, applying each tape using a liberal brush-coat of goo. After a further drying period, tapes are subsequently brush-coated again with pink goo. I can only re-emphasise how you must follow the Poly-Fiber manual exactly. Note the squeegee residue from applying the longeron tapes...this irons out using a hot 350F iron now, before the first spray coat of pink goo is applied. |
 |
 |
 |
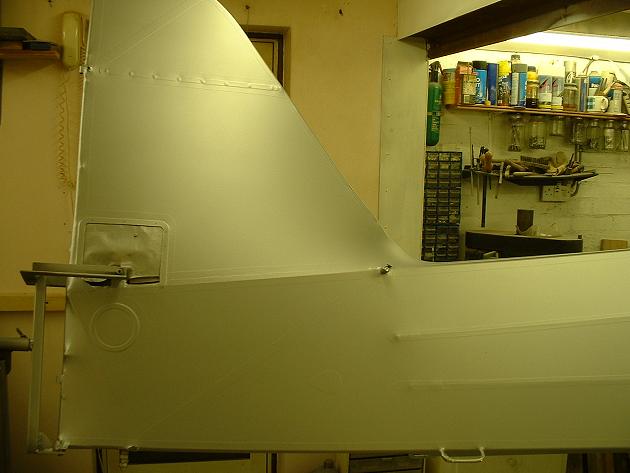
A selection of views of the tapes all applied.
In the centre photo, the tape between the forward stabiliser tube & lower tailbrace wire attachment point is there because the original fabric didn't have a tape, & the fabric cracked along that line. Note that I have yet to make an aperture frame for access to the top elevator horn. These will be made soon, it is important that the fin fabric be taught before these are cut out. |
 |
 |
 |
The last photo shows the underside of the tail
(where the leaf springs bolt to) left open for ventilation. The long bolt & hex
spacers are used to keep the tail off the ground. Note the dollar-patch just forward of this bolt, this will become a drain hole ahead of the tailspring attachment bulkhead. |
I make new aluminium frames for the elevator inspection panel. These frames will be fabricked to the fuselage.
 |
 |
 |
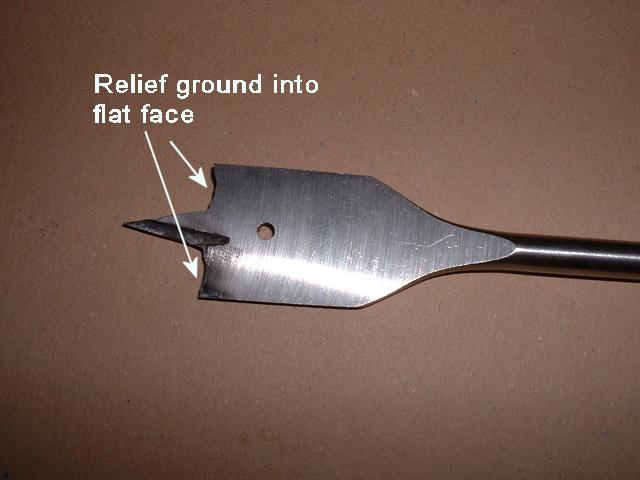
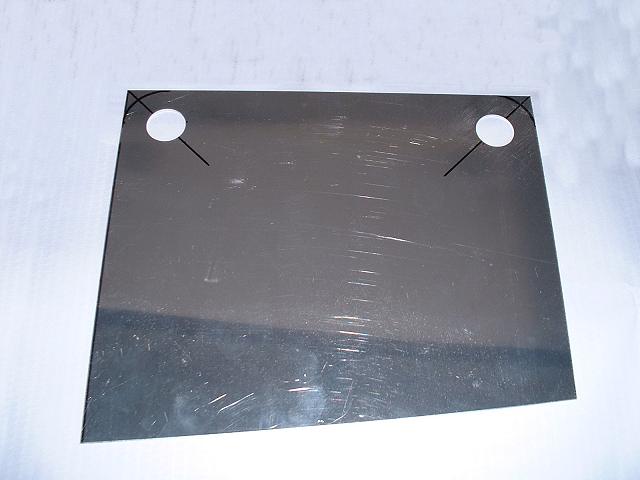
The inside contour is marked out, and two holes
drilled to form the interior curves. I use wordworking bits to cut large diameter (up to 32mm) holes in aluminium, I relieve the flat cutting face so as to cut a circular disc from the material. The line between the two is scored through, using a sharp implement. |
 |
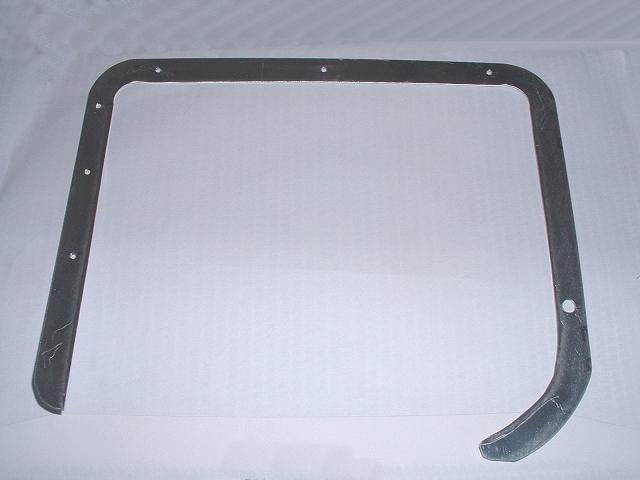 |
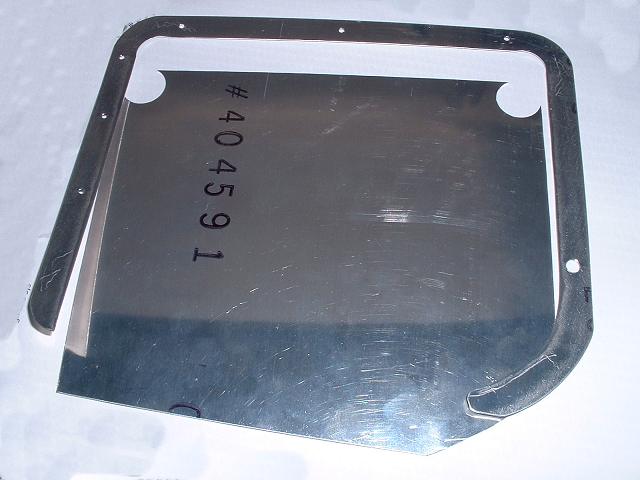
The middle comes away, leaving the frame. This is alodined and then pre-coated with pink goo to ensure proper adhesion of the fabric. |
|
|
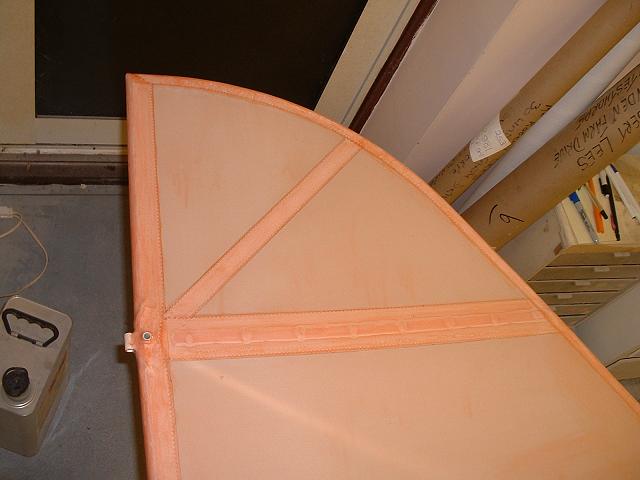
 No, it hasn't split...I've cut the diagonals with a knife... |
 ...and then trimmed the loose bits... |
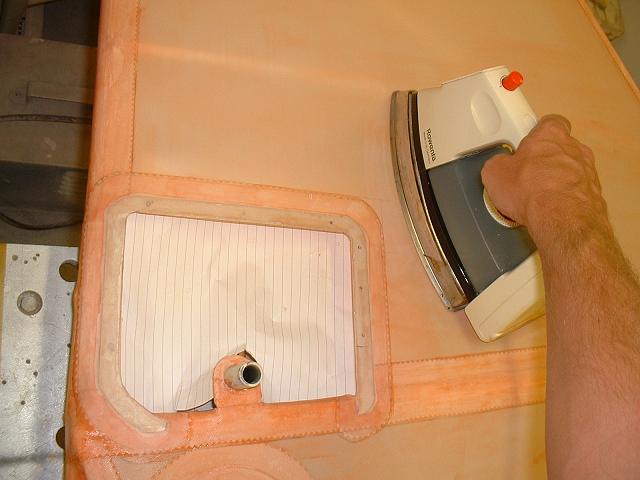 ...and folded these flaps inside the fin and glued them for additional security. |
The white lined paper is used
to prevent glue drips from falling on to the opposite side of the fin. Helps with the photographic detail too! |
The iron was used to re-taughten the fin fabric, it went ever so slightly slack on cutting the opening out. But tightened right up again at 350 degrees F
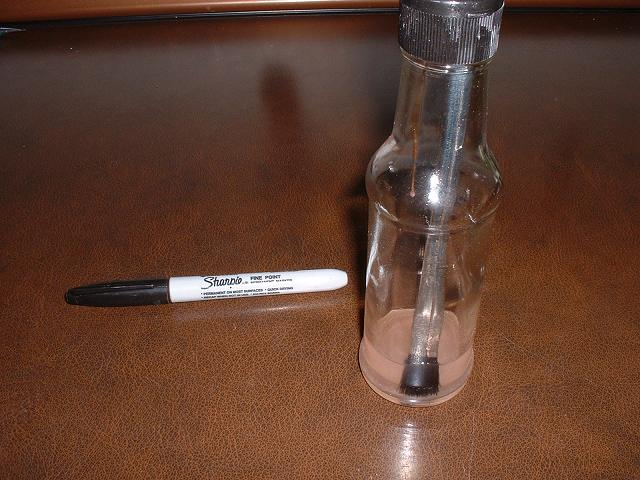 |
By the way, I keep my little 1/2" glue
brushes in a tall thin sealed glass jar (in my case a soy-sauce bottle) with a little MEK
in the bottom, this keeps the brush from drying out. Photo also shows the ubiquitous Sharpie pen, invaluable for marking out aluminium. But NEVER fabric. |
I am now ready to start spraying the fuselage, and spraying of the Poly-Brush coats is not terribly exciting, and does not warrant the publication of photos. Just before reaching this stage, I have been carrying out further ironing, smoothing, and cleaning processes to get the fabric as good as I can (you cannot heat-smooth enough).
 |
Masking off the interior prior to spraying the
exterior..quite a job to mask off the complete interior that I had previously sprayed,
this became a subject of debate as to whether it was a good idea to spray the interior
first...too late to worry about now! A selection of masking products used...cling film for the front fuselage, Kraft Paper for the interior, whatever came to hand. The last job before spraying. |
 |
 |
After spraying two coats of the pink goo (Poly-brush) as per the manual, I spray the first coat of silver. Here's two views of the first coat, and it shows every imperfection in the previous sealing pink goo coats. I had a few minor glitches, but now rectified. |
 |
Here's a nice little stirrer that Aircraft Spruce do for mixing, and for stirring up the mud from the bottom of the can...it gets right underneath the rim (as the bishop said to the actress)... |
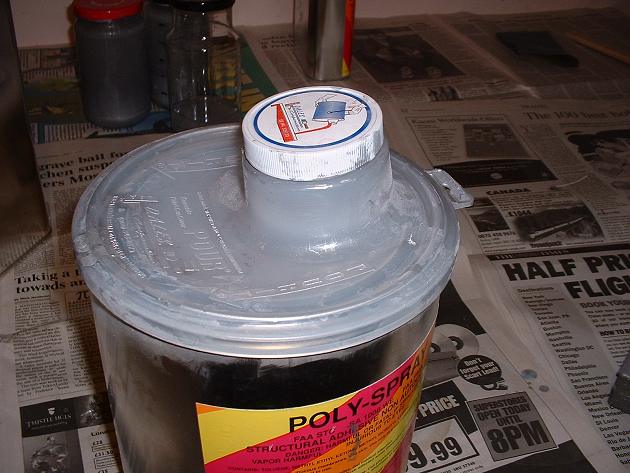 |
...(and the pouring lids are very useful too)... |
 |
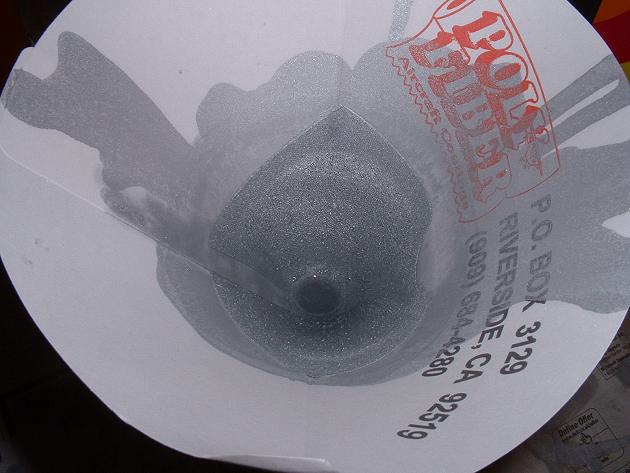 |
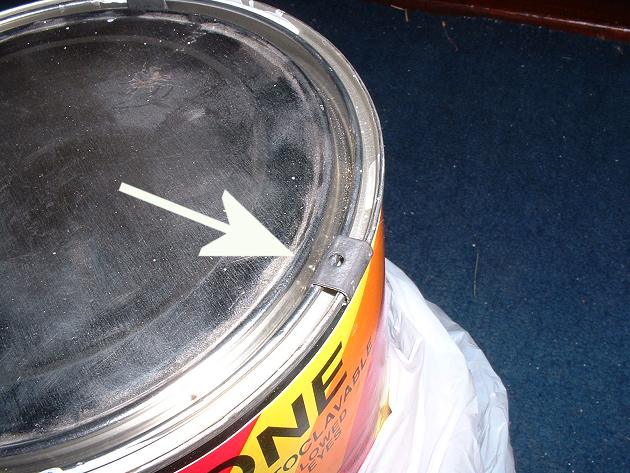
...but after stirring up the mud, I did what
the manual says, and took the cans of paint to the local DIY centre and borrowed their
paint shaker...but after you stir up the mud from the bottom, put the little metal lid
clips back on...many places require them for security of the lid. Filtering the silver is also important to keep the large chunks of aluminium from the fabric. This filter here is so blocked that the last dregs will not strain through, this despite shaking in the local DIY place. |
 |
Any sanding required (and I sanded each coat of silver) needs to be done wet. Fresh water with a little washing-up liquid is the best, but requires proper rinsing and drying with paper towels to minimise residue. |
 |
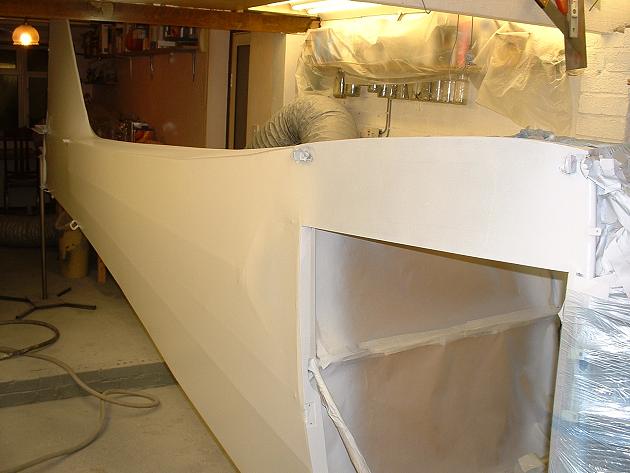 |
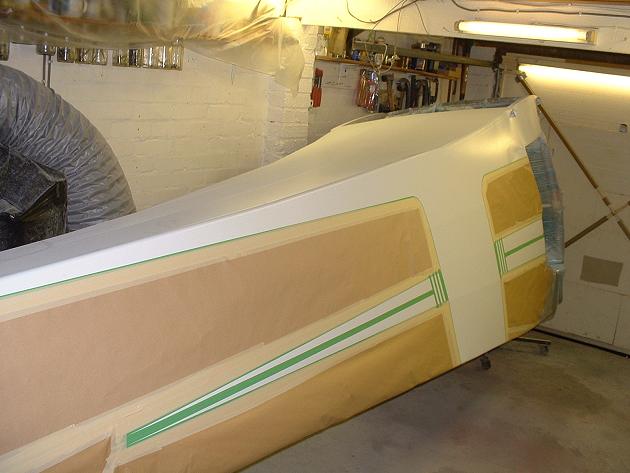
The first coat of white Poly-Tone goes on.
Boy, this stuff is a pleasure to spray. But bright lights are
needed to see the white covering the silver. I added 30 ml of BR-86-00 retarder per UK pint to the mix (in fact I added it to the aluminium Poly-spray too) to slow down the evaporative process. This increases the gloss level. The measures are exactly as per the Poly-Fiber manual. If I think I need more gloss, I will refrigerate the next (and last) coat. |
 |
 |
 |
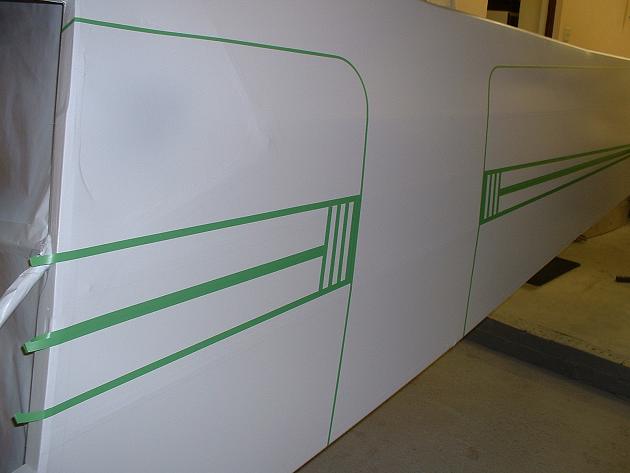
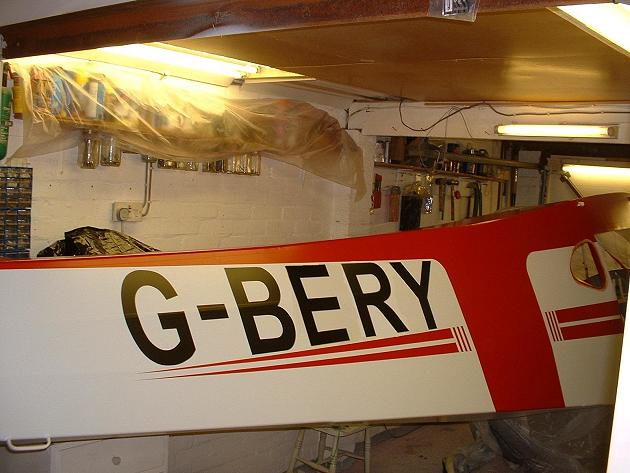
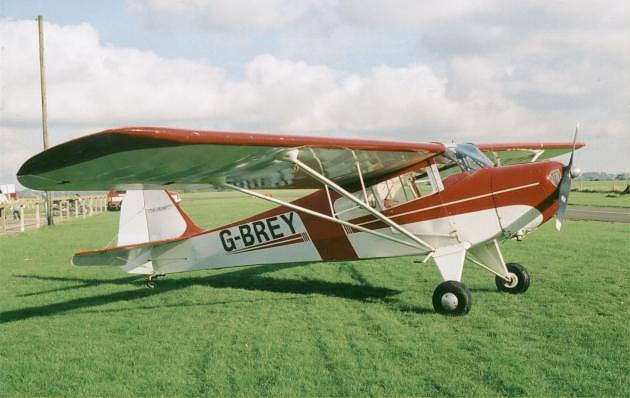
After spraying the second full coat of white, I
mask off for the red. I am using exactly the same paint scheme as she originally had
(see photo here) and using a lot of the original fabric to ensure
the trim lines come out in the right place. Green fine line polypropylene tape is used to get the curves. |
 |
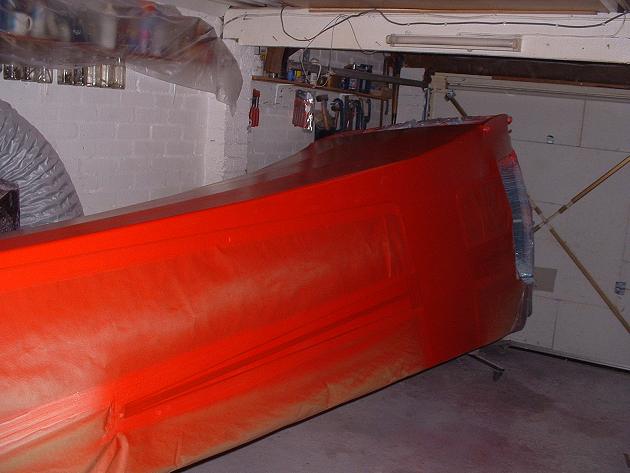 |
After masking, a fine mist coat of red is applied, followed by the first full wet coat. |
 |
After a second coat of red, the masking can be
removed. Whoever designed this trim scheme designed a clever scheme. The horizontal paint line between the red on the top and the white on the sides extends forward from (and in line with) the stabilisers, and aft from the line of the door windows. These two non-parallel lines meet at and blend into the broad vertical stripe. The two pin stripes follow the longitudinal axis of the fuselage, and are not parallel to either of the lines joining the red top and white sides. |
 |
 |
 |
...and I can now cut out the fabric covering the two rear D windows. |
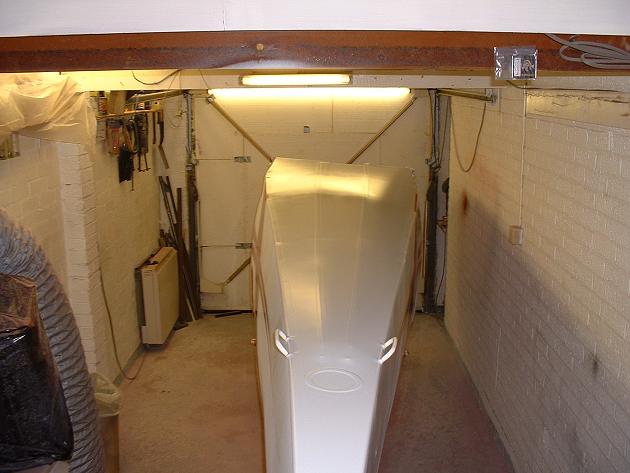 |
Belly is all white. |
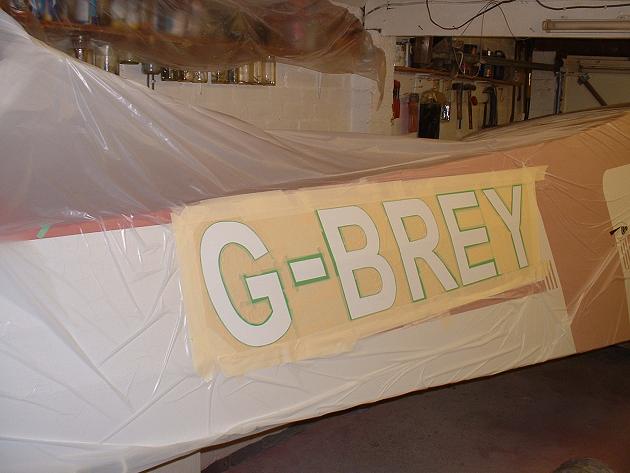 |
The registration marks I mask by
hand because they are tapered and italic. For general use, there are commercial
outlets for spray masks. I used a computer to get the letter shapes right &
printed them onto A3 paper, which I then cut out and traced the lines on the fuselage.
The same green fine-line masking tape as before is used to get the
curves. The remainder of the fuselage is covered in plastic sheeting. This is the proper automotive, statically-charged sheeting. It sticks to the fabric, and all dust then sticks to it. Excellent stuff. |
||
 |
A spray mist-coat... |  |
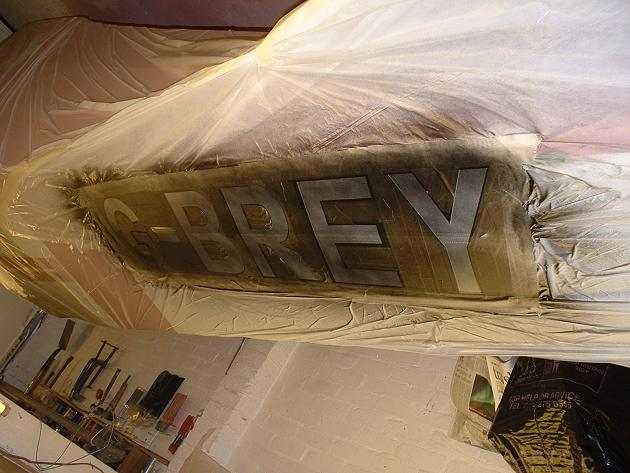
...followed by a full wet coat... |
 |
 |
...and the masking is removed while the paint is still tacky to reveal the final effect. The whole masking/painting job took about 8 hours for both sides. |
 |
Some fettling of the D window trim pieces. |
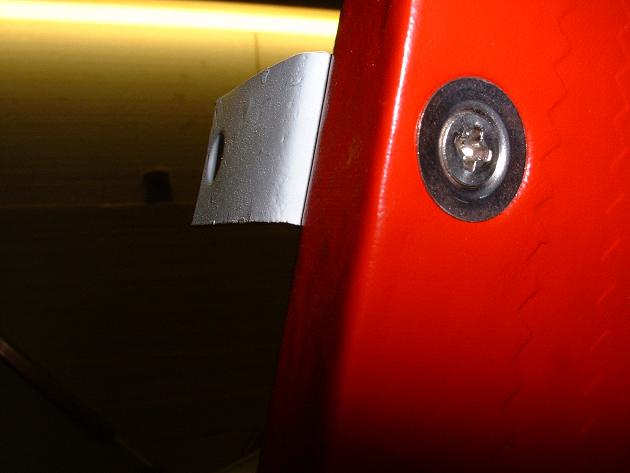 |
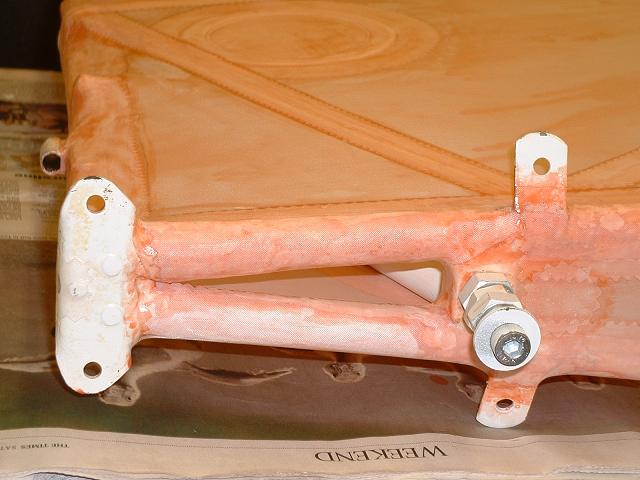
The windscreen attachment brackets get installed. Because of the new wooden door frames, some minor fettling is required to get these brackets to align properly. And I was so convinced that I had made the holes in exactly the same place as the original wood! Here you can see I need to move the bracket inwards so that the outer face is flush with the outside of the red doorpost. Note the stainless countersunk washers to spread the load. The woodwork was rebated to permit these to lie flush, and the washer presses the painted fabric into the rebate for a neat finish. |
 |
I can now start to see how the windscreen fairings will need to be modified to align up correctly. I will be making all new pieces here, because of the aluminium corrosion. |
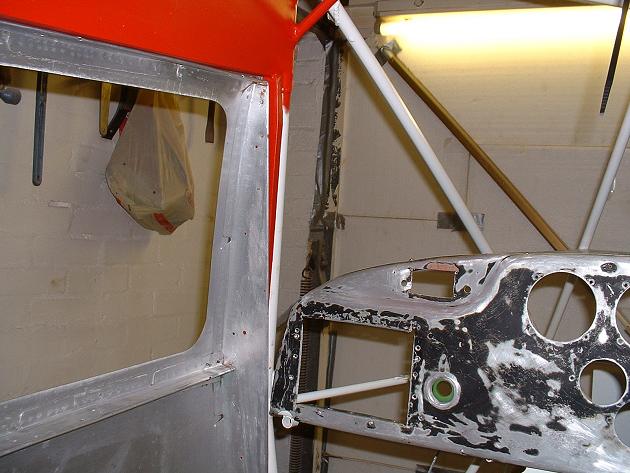 |
The pilot's eye view is improving...who needs instruments, anyway? And I always wanted to be open cockpit, non-radio... |
 |
 |
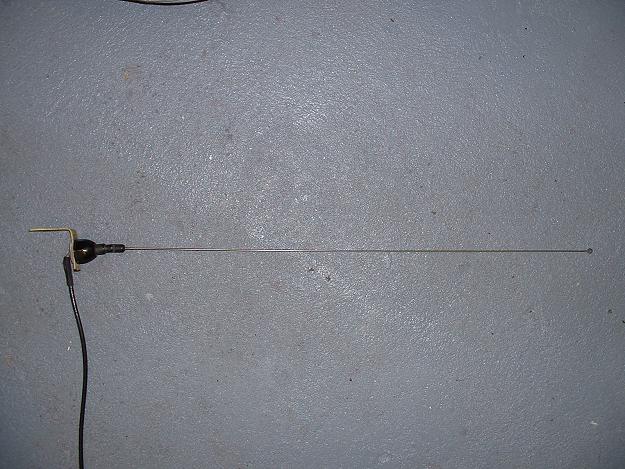
The whip antenna is serviced...including removing 1/2 lb of excess cable. It is mounted on the wing root fitting so that the whole fuselage frame acts as the ground plane, no aluminium sheet required. The whip sticks up over the wing band fairing. Length of whip is approx 21". I might put in a proper ground wire due to the paint on the frame. An old ELT whip is used on one of our other Tcrafts, this works fine. |
Fuselage structural work
Fuselage Fabric
Wing Structural work
Wing Fabric
Ailerons
Cowls
Tailfeathers & Gear Legs
Doors Control Column & Panel
Final Assembly